
 Pin it
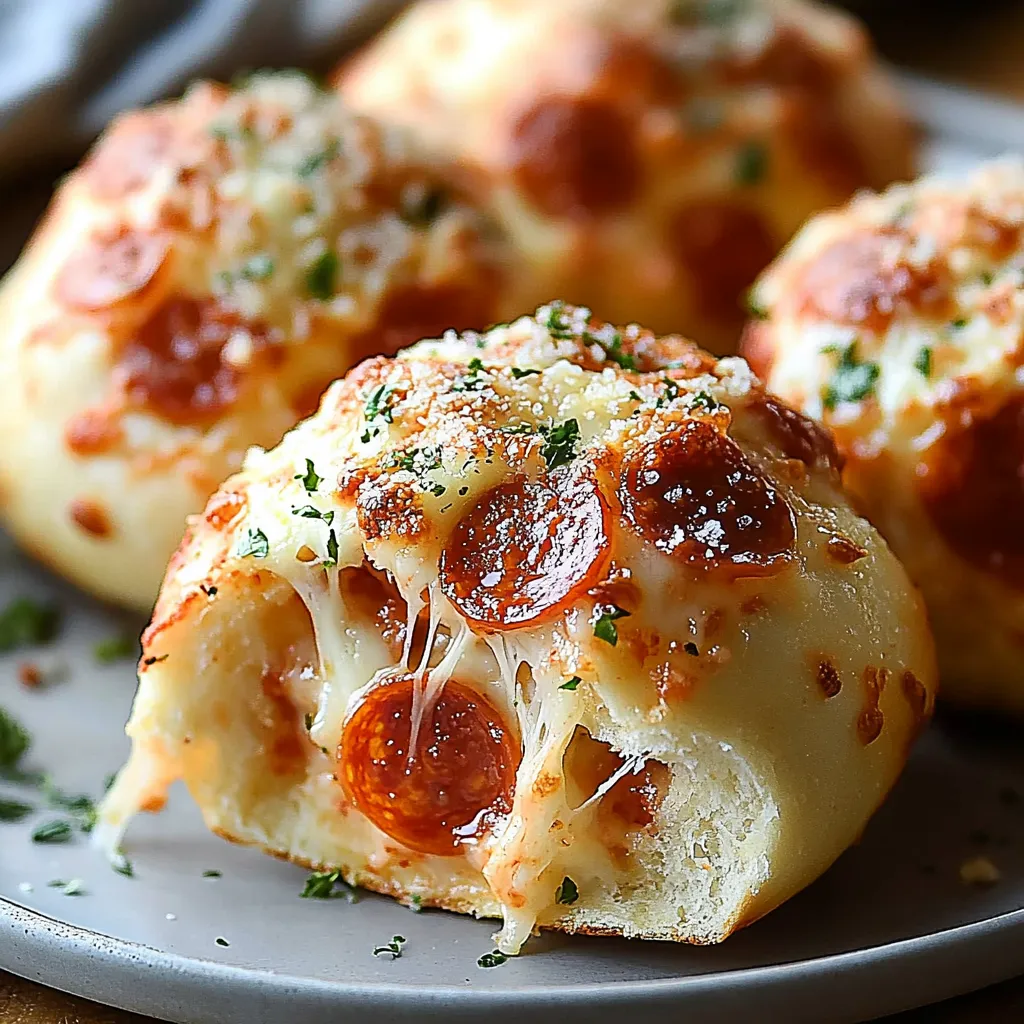
This pepperoni pizza bomb recipe transforms ordinary refrigerated biscuits into irresistible cheesy bite-sized treats that disappear minutes after hitting the table. Each golden bomb bursts with molten mozzarella and zesty pepperoni for an addictive flavor explosion that's easier to make than traditional pizza.
I first made these for my nephew's birthday party as an alternative to ordering delivery pizza. Three years later they're still requested at every family gathering and have become my signature dish that even the pickiest eaters devour.
Ingredients
- Refrigerated buttermilk biscuits: Provide the perfect pillowy dough that puffs beautifully in the oven while containing all that melty goodness
- Pizza sauce: Adds that classic tomato flavor without making the dough soggy; look for one with herbs already mixed in
- Pepperoni minis: Offer concentrated flavor in petite packages perfect for these bombs; regular sized slices work too
- Mozzarella cheese cubes: Create those magnificent cheese pulls when you bite in; fresh mozzarella works but low-moisture melts more consistently
- Melted butter: Forms the base for the garlic butter coating that elevates these from good to magnificent
- Parmesan cheese: Both in the butter mixture and sprinkled on top adds a nutty savory flavor that complements the mozzarella
- Minced garlic: Infuses the butter with aromatic flavor; use fresh for the brightest taste
- Italian seasoning: Ties all the pizza flavors together in the garlic butter coating
Step-by-Step Instructions
- Prepare Your Workspace:
- Preheat your oven to 375°F and create a nonstick surface by lining a baking dish with parchment paper and applying cooking spray. This dual approach ensures your pizza bombs release perfectly after baking.
- Prep The Biscuit Dough:
- Open your can of refrigerated biscuits and transform each one by gently rolling it into approximately 3-inch circles. Apply light pressure with your rolling pin, working from the center outward to maintain even thickness throughout.
- Add The Sauce Layer:
- Carefully spread about 1 teaspoon of pizza sauce onto each flattened biscuit, ensuring you leave a clean quarter-inch border around the edges. This border is critical for proper sealing, so resist the urge to overfill.
- Fill With Cheese And Pepperoni:
- Place 2-3 pepperoni minis and exactly 2 mozzarella cubes in the center of each sauced biscuit. Positioning them in the center rather than scattered helps with the sealing process in the next step.
- Create The Bomb Shape:
- Carefully fold the edges of each biscuit up and over the fillings, working your way around the circle. Pinch the edges firmly together to create a complete seal; imagine you're creating a little purse. Any gaps will allow cheese to escape during baking.
- Position For Baking:
- Arrange your sealed pizza bombs seam side down in your prepared baking dish. This positioning helps maintain the seal during baking and creates a smooth top surface for the butter.
- Make The Garlic Butter:
- In a small bowl, thoroughly combine the melted butter, Parmesan cheese, minced garlic, and Italian seasoning. This mixture will be brushed over your bombs twice for maximum flavor.
- First Bake:
- Generously brush each pizza bomb with your garlic butter mixture, coating all exposed surfaces. Then bake for 15-18 minutes until the tops become gloriously golden brown and the dough is fully cooked.
- Final Touch:
- Immediately after removing from the oven, brush each bomb with the remaining garlic butter mixture while they're still hot. This allows the butter to soak into the hot dough. Finish with a generous sprinkle of extra Parmesan cheese.
 Pin it
Troubleshooting Tips
The most common issue with pizza bombs is cheese leakage during baking. If you notice some bombs splitting open, simply use a spoon to push the cheese back inside while still hot. The cheese will remelt and stay put as it cools.
When sealing your bombs, make sure to work with dry fingers. Wet or saucy fingers make it difficult to create a proper seal. Keep a kitchen towel nearby to wipe your hands between each bomb.
For even cooking, arrange your bombs with about an inch of space between them. Crowding the pan can lead to uneven browning and some bombs not cooking through completely.
Flavor Variations
Create a supreme pizza bomb by adding tiny diced bell peppers, black olives, and small pieces of cooked Italian sausage along with the pepperoni. Just remember to keep the total filling amount similar to avoid overstuffing.
For a vegetarian option, replace the pepperoni with sautéed mushrooms, spinach, and roasted red peppers. The vegetables release moisture during cooking, so pat them dry before adding to prevent soggy bombs.
Buffalo chicken bombs offer a spicy alternative by swapping pepperoni for shredded rotisserie chicken tossed in buffalo sauce. Add a small cube of blue cheese alongside the mozzarella for an authentic buffalo chicken experience.
Serving Suggestions
Create a pizza bomb bar by serving these alongside various dipping sauces beyond pizza sauce. Ranch dressing, garlic aioli, and pesto all make excellent companions to these cheesy treasures.
For a complete game day spread, pair these bombs with other finger foods like buffalo wings, loaded potato skins, and a fresh vegetable platter with dip to balance the richness.
Transform these into a proper meal by serving alongside a crisp Caesar salad. The cool, crunchy lettuce provides the perfect contrast to the warm, cheesy bombs.
Frequently Asked Questions
- → Can I use pre-shredded mozzarella?
Yes, pre-shredded mozzarella can work, but cubed mozzarella gives a more satisfying cheesy burst.
- → Can I substitute pepperoni minis?
Definitely! You can use regular pepperoni slices or even diced salami for variation.
- → What other dipping sauces can I use?
Besides pizza sauce, try marinara, ranch dressing, or garlic aioli for dipping.
- → Can I make these in advance?
You can prepare them in advance, refrigerate, and bake when ready to serve for the freshest taste.
- → Can I freeze leftovers?
Yes, freeze any leftovers tightly wrapped or in an airtight container for up to 1 month. Reheat in the oven before serving.