
 Pin it
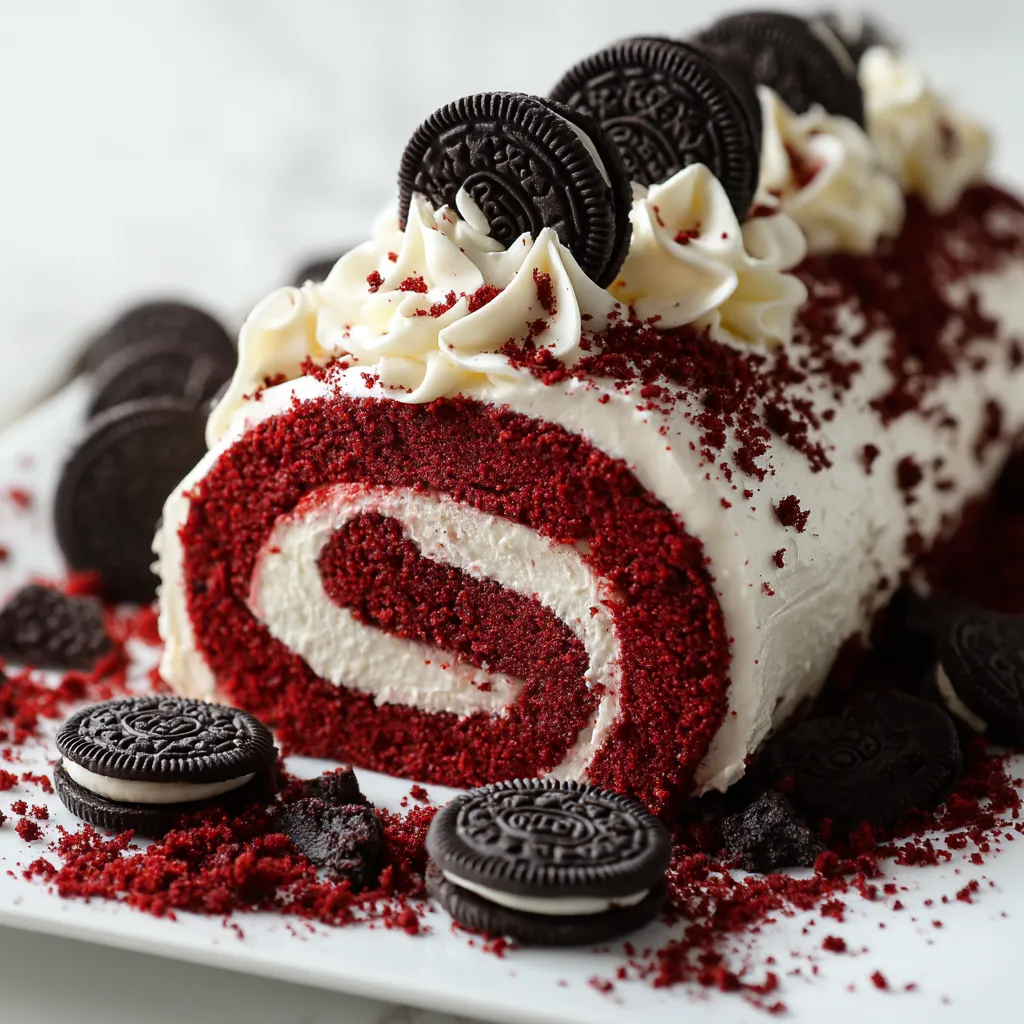
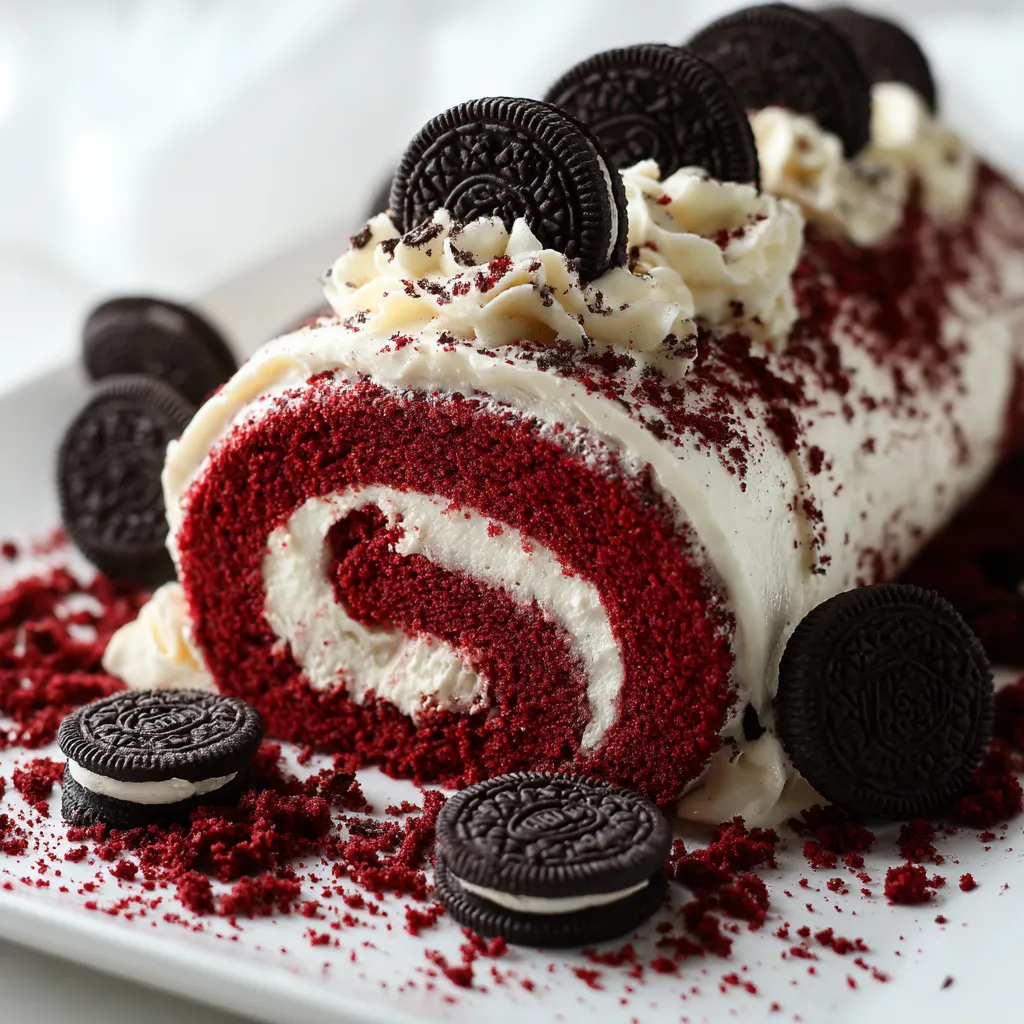
This red velvet Oreo cake roll has become my signature dessert for gatherings where I want to make a lasting impression. The combination of deep crimson cake wrapped around creamy Oreo filling and finished with chocolate ganache creates a show-stopping dessert that tastes even better than it looks.
I first made this for my sister's birthday when she requested something with both red velvet and Oreos. The look on her face when I brought it out was priceless, and now it's requested at nearly every family celebration.
Ingredients
- All-purpose flour: Provides structure while keeping the cake tender
- Unsweetened cocoa powder: Gives authentic red velvet flavor without excessive sweetness
- Large eggs: At room temperature create the perfect rise and light texture
- Red food coloring: Delivers that signature vibrant color you expect
- Cream cheese: Forms the base of a tangy filling that balances the sweetness
- Crushed Oreo cookies: Add textural contrast and that beloved flavor everyone recognizes
- Semi-sweet chocolate chips: Create a ganache that sets beautifully without being too hard to cut
Step-by-Step Instructions
- Prepare the Baking Surface:
- Preheat your oven to 350°F and line a jelly roll pan with parchment paper, leaving a small overhang on all sides. This prevents any sticking and makes removal effortless. Dust a clean kitchen towel generously with powdered sugar which will prevent the hot cake from sticking when rolled.
- Create the Batter:
- Sift together your dry ingredients to remove any lumps which could create tunnels in your delicate cake. In a separate bowl, beat eggs and sugar for a full 5 minutes until they become pale yellow and triple in volume. This creates the light, airy texture essential for a cake that rolls without cracking.
- Bake with Precision:
- Spread the batter evenly into your prepared pan, paying special attention to the corners. Bake just until the cake springs back when touched lightly in the center, about 12-15 minutes. Overbaking will cause the cake to crack when rolled, so watch carefully during the final minutes.
- Roll While Warm:
- Immediately turn the hot cake onto your prepared towel, peel off the parchment, and roll up starting from the short end. The cake must be rolled while warm to create muscle memory in the structure. Allow to cool completely in this rolled position which takes about 45 minutes.
- Create Dreamy Filling:
- Beat the cream cheese until completely smooth before adding other ingredients to avoid lumps. Fold in the whipped cream with a gentle hand using a figure-eight motion to maintain airiness. The crushed Oreos should be folded in last with minimal stirring to prevent the filling from turning completely gray.
- Assemble with Care:
- Unroll the cooled cake gently, spread the filling evenly leaving a half-inch border around all edges. When re-rolling, use the towel to guide the cake but don't roll the towel inside. Apply even, gentle pressure to create a tight roll without squeezing out the filling.
- Finish with Ganache:
- Allow the heavy cream to come just to a simmer before pouring over chocolate as boiling cream can make the ganache bitter. Let the ganache cool slightly before pouring over the cake roll to prevent it from soaking into the cake too much. Refrigerate for at least an hour before slicing for clean cuts.
 Pin it
This cake reminds me of my grandmother's kitchen where I first learned to bake. She always said a dessert should be as beautiful as it is delicious, and this cake roll honors that tradition perfectly. The Oreo cream filling is my favorite part, bringing back memories of twisting apart cookies as a child.
Make-Ahead Tips
This cake roll actually improves with time in the refrigerator as the flavors meld together beautifully. For best results, make it the day before serving and store covered in the refrigerator. The ganache will set to a perfect slicing consistency, and the filling will firm up just enough.
Perfect Slicing Technique
For clean, photogenic slices, warm your knife under hot water and wipe dry between each cut. Use a gentle sawing motion rather than pressing straight down to avoid compressing the cake. Serve slices on their sides to showcase the beautiful spiral pattern of red cake and white Oreo filling.
Troubleshooting Common Issues
If your cake cracks while rolling, don't panic. The filling and ganache will cover most imperfections. For severe cracks, consider turning your cake roll into a trifle by cubing the cake and layering with the filling in a glass bowl topped with ganache. No one will know it wasn't intentional!
Seasonal Variations
During holiday seasons, customize this cake roll with colored sprinkles on top of the ganache while still wet. For Valentine's Day, add heart-shaped sprinkles; for Christmas, use red and green; for Halloween, use orange and black. The versatile base recipe works beautifully year-round with simple decorative adjustments.
Frequently Asked Questions
- → How can I make the cake roll without it cracking?
Ensure the cake is warm when rolling with a powdered-sugar-dusted towel. Cooling it this way helps maintain its shape.
- → Can I substitute the red food coloring?
Yes, you can omit it or use natural colors like beet juice for a similar effect.
- → What’s the best way to make smooth ganache?
Heat the cream until it just simmers, then pour it over chocolate chips. Stir gently until smooth and glossy.
- → How do I store leftovers?
Store the cake roll in an airtight container in the refrigerator for up to 3 days for optimal freshness.
- → Can I use a different filling?
Sure! You can try a cream cheese frosting, whipped ganache, or even fruit preserves for variety.