
 Pin it
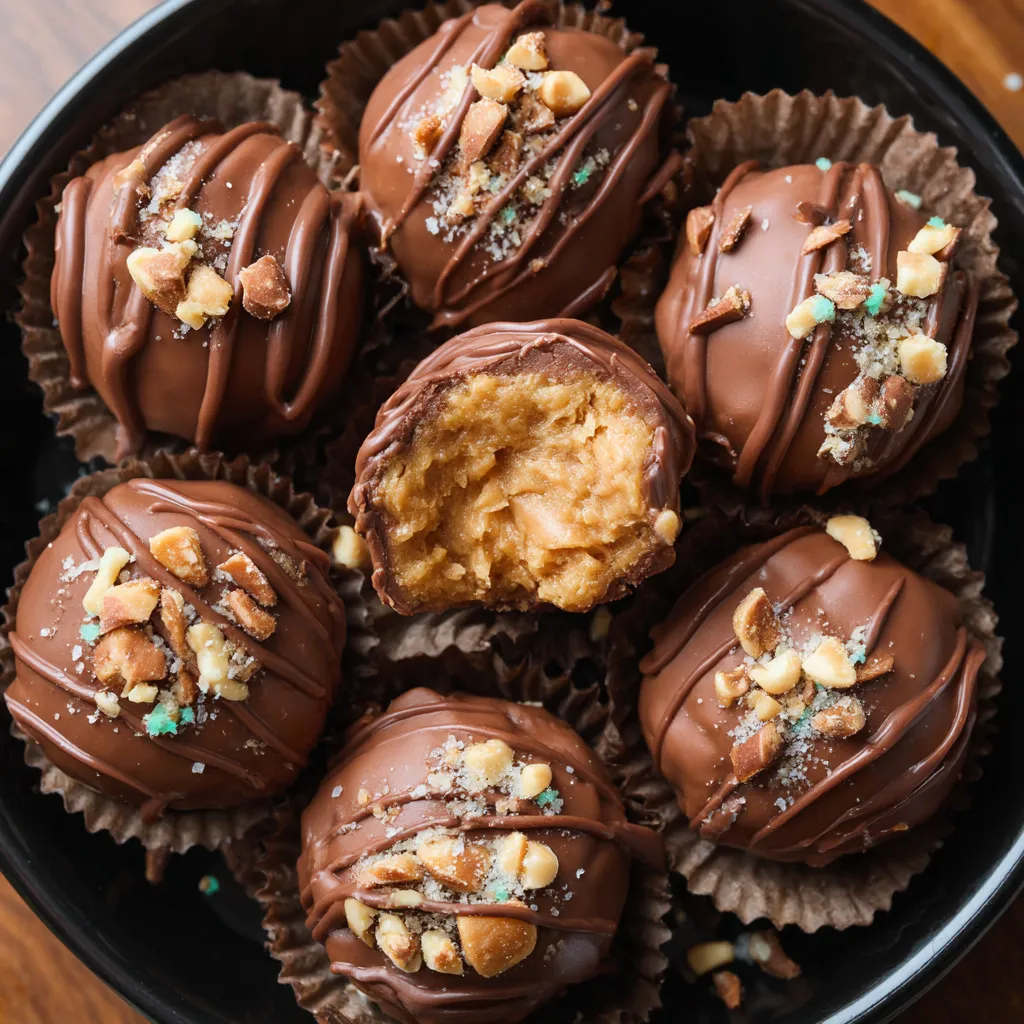
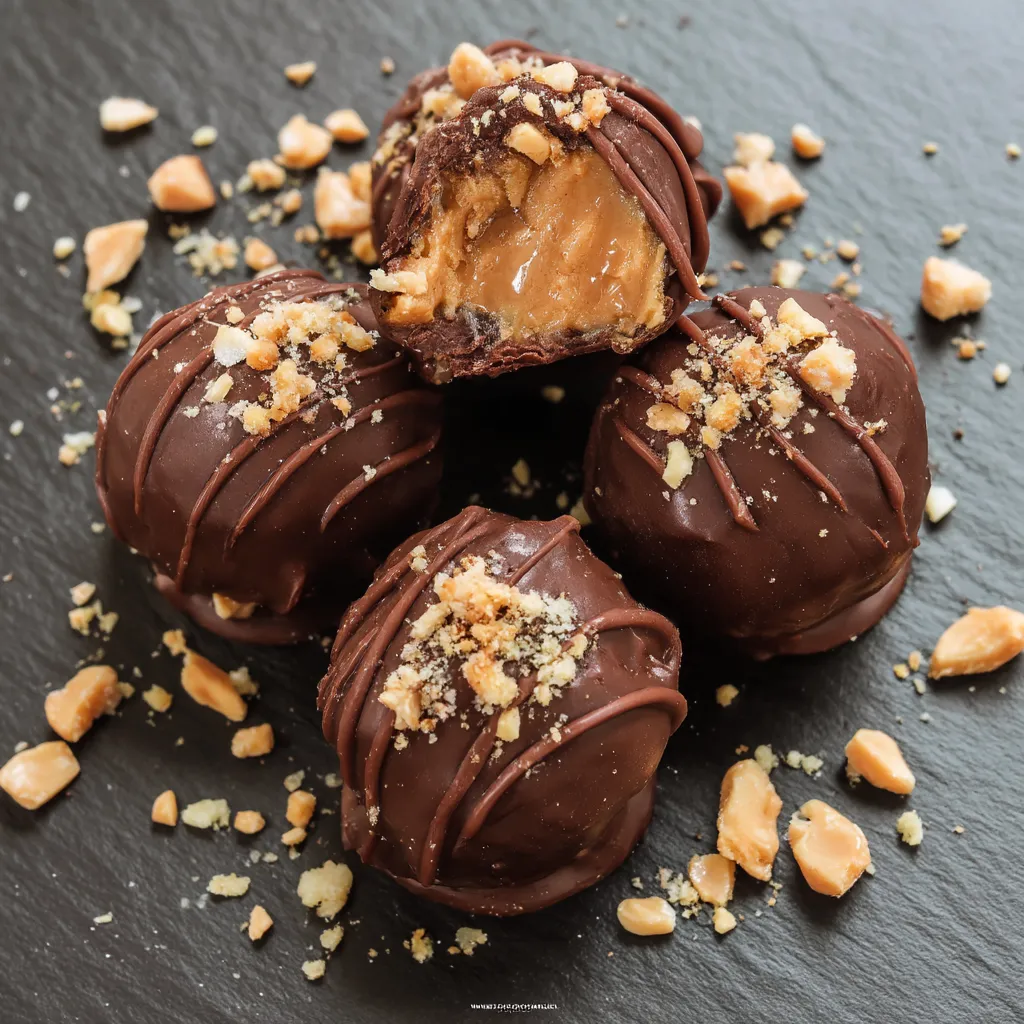
This homemade peanut butter balls recipe has been my family's holiday tradition for years. The combination of creamy peanut butter and rich chocolate creates an irresistible treat that disappears from cookie trays within minutes. The beauty lies in their simplicity—just a few pantry ingredients transformed into something truly special.
I first made these during a Christmas party when I needed a last minute dessert. They were such a hit that everyone assumed I had spent hours in the kitchen. Now they're requested at every family gathering from November through January.
Ingredients
- Crushed graham crackers: Provide a subtle honey sweetness and perfect texture. Look for whole graham crackers and crush them yourself for the freshest flavor.
- Creamy peanut butter: Creates that signature melt in your mouth center. Choose a quality brand like Jif or Skippy for best results.
- Powdered sugar: Sweetens and helps bind everything together. Sift it first to prevent lumps in your mixture.
- Room temperature salted butter: Adds richness and helps create that fudgy texture. The touch of salt enhances the peanut butter flavor.
- Chocolate melts: Coat each ball in a perfect shell. Dark or milk chocolate both work beautifully depending on your preference.
- Optional toppings: Like chopped peanuts or sprinkles add festive flair and texture. Choose seasonal colors for holiday appeal.
Step-by-Step Instructions
- Create the peanut butter mixture:
- Combine the crushed graham crackers, peanut butter, powdered sugar, and room temperature butter in a medium bowl. Mix everything until completely smooth and uniform. Take your time here—proper mixing ensures the perfect consistency.
- Form the balls:
- Use a teaspoon sized scoop to portion the mixture, then roll each scoop between your palms to create perfectly round balls. If the mixture becomes sticky, refrigerate it for 10 minutes to firm up slightly. Place each formed ball on a parchment lined baking sheet with small spaces between them.
- Initial chilling phase:
- Place the entire baking sheet in the refrigerator for 30 minutes. This crucial step helps the balls hold their shape when dipped in warm chocolate. Do not skip this step or you might end up with misshapen treats.
- Prepare the chocolate:
- While the peanut butter balls chill, melt your chocolate using either a double boiler method or microwave. If using a microwave, heat in 30 second intervals at 50% power, stirring between each interval until smooth. The chocolate should be completely liquid but not too hot.
- Dip the balls:
- Once chilled, use a fork or two spoons to dip each peanut butter ball completely into the melted chocolate. Gently tap the fork against the side of the bowl to remove excess chocolate. Transfer each chocolate covered ball back to the parchment lined sheet.
- Add toppings:
- If using toppings, sprinkle them onto each chocolate covered ball immediately after dipping while the chocolate is still wet. Work quickly as the chilled balls will cause the chocolate to set faster than expected.
- Final chilling:
- Return the completed tray to the refrigerator for at least 30 minutes or until the chocolate is completely set. This ensures clean cutting and perfect presentation when served.
 Pin it
My grandmother first taught me this recipe when I was just eight years old. She would let me roll the balls while she handled the chocolate dipping. The memory of her patience as I created misshapen lumps that she would quietly fix still makes me smile every time I make these treats.
Perfect Chocolate Coating Technique
The secret to a flawless chocolate coating lies in temperature control. Make sure your peanut butter balls are thoroughly chilled before dipping them into chocolate that has been melted but slightly cooled. Too hot chocolate will cause the peanut butter centers to melt and create a messy situation. I recommend working in small batches, keeping the undipped balls in the refrigerator until ready to coat them.
For an extra professional finish, you can add a tiny bit of coconut oil or shortening to your melted chocolate. This creates a thinner consistency that results in a smoother coating and helps the chocolate set with a beautiful shine. About one teaspoon per cup of chocolate is all you need for this magic trick.
Creative Variations
While the traditional recipe is perfect as is, there are countless ways to customize these treats. Try mixing mini chocolate chips into the peanut butter mixture for added texture and chocolate flavor. For a more complex flavor profile, consider adding a quarter teaspoon of cinnamon or a splash of vanilla extract to the base mixture.
White chocolate lovers can reverse the typical approach by coating the balls in white chocolate instead of dark or milk varieties. For a truly decadent version, try a double dip first in dark chocolate, allow it to set, then drizzle with white chocolate for a striking visual effect that also delivers delightful flavor contrast.
Make Ahead and Storage
One of the biggest advantages of peanut butter balls is their excellent make ahead potential. The finished treats can be stored in an airtight container in the refrigerator for up to five days, though they rarely last that long in my house. Layer them between sheets of parchment paper to prevent sticking.
For longer storage, place fully set peanut butter balls in a freezer safe container, separated by parchment paper, and freeze for up to three months. When ready to enjoy, simply thaw them in the refrigerator overnight. The texture remains nearly perfect, making them an ideal candidate for advance holiday preparation.
Frequently Asked Questions
- → How do you store peanut butter balls?
Store them in an airtight container in the refrigerator for up to 5 days or freeze for up to 3 months.
- → Can I use crunchy peanut butter instead of creamy?
Yes, you can use crunchy peanut butter for added texture, but creamy peanut butter creates a smoother consistency.
- → Can I substitute the graham crackers?
Yes, crushed cookies like digestives or vanilla wafers work well as a substitute for graham crackers.
- → What type of chocolate should I use?
Chocolate melts are ideal, but you can also use semisweet or dark chocolate for coating.
- → Can I make them ahead of time?
Yes, these can be made ahead and stored in the refrigerator or freezer until you're ready to serve.