
 Pin it
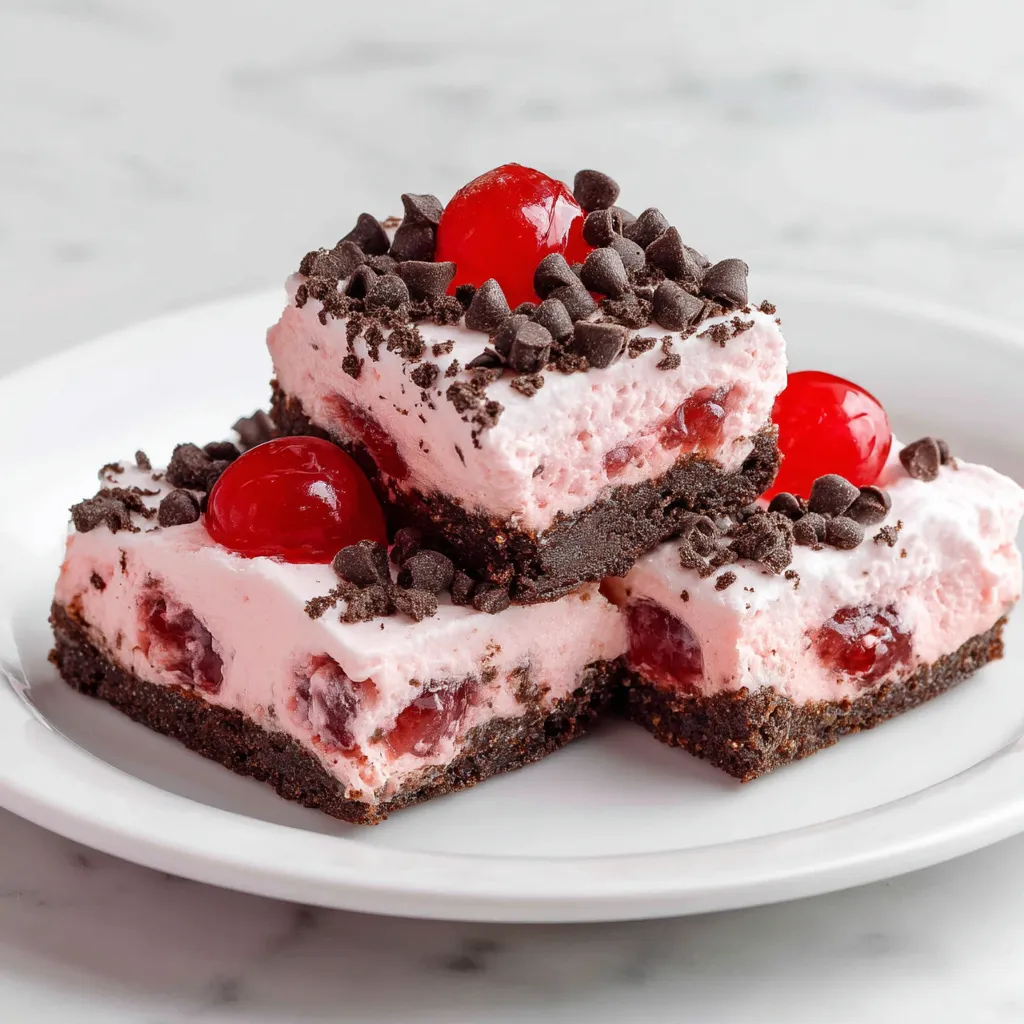
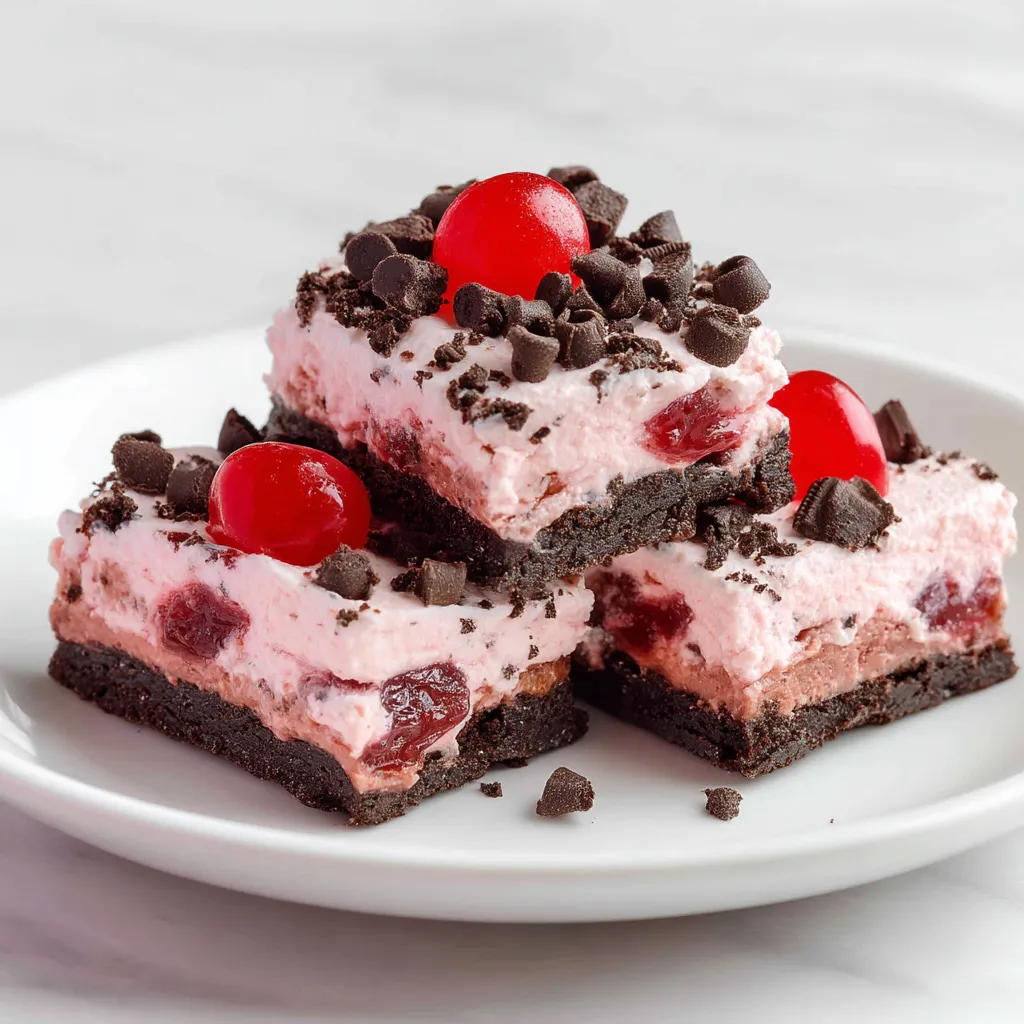
This decadent no-bake chocolate cherry bar recipe combines the perfect balance of chocolate and cherry flavors in a creamy cheesecake-like dessert that requires zero oven time. The combination of an Oreo cookie crust with a silky cream cheese and cherry filling creates a showstopping dessert that always disappears quickly at gatherings.
I first made these bars for a neighborhood potluck when my oven broke unexpectedly. They were such a hit that I now make them regularly for family gatherings and they're always the first dessert to disappear from the table.
Ingredients
- Oreo cookies: Provide the perfect chocolatey base that complements both the cherry and chocolate flavors in the filling. Use regular Oreos with the cream filling intact for the best texture and flavor.
- Butter: Binds the crust together and adds richness. Use unsalted butter if you want to control the salt level.
- Cream cheese: Creates the luxurious creamy base for the filling. Full-fat cream cheese works best for the richest flavor and texture.
- Confectioners' sugar: Sweetens without graininess. It dissolves perfectly into the cream cheese for a smooth filling.
- Cherry pie filling: Adds fruity tartness and beautiful color. Look for a high-quality brand with whole cherries for the best flavor and appearance.
- Mini chocolate chips: Distribute evenly throughout the filling for bursts of chocolate in every bite. The semi-sweet variety balances the sweetness perfectly.
- Whipped cream: Lightens the texture and makes the filling fluffy. Fresh whipped cream works beautifully but store-bought whipped topping is convenient and reliable.
Step-by-Step Instructions
- Prepare the Baking Dish:
- Spray your 7x11-inch baking dish with nonstick cooking spray, making sure to cover all the corners and edges. This ensures your bars will release cleanly when serving.
- Make the Oreo Crust:
- Place whole Oreo cookies including the filling into your food processor and pulse until you achieve a fine consistent crumb texture. Some tiny pieces are fine but avoid large chunks that would make the crust uneven. Transfer the crumbs to a mixing bowl and pour in the melted butter. Stir thoroughly until every crumb is moistened and the mixture resembles wet sand.
- Form the Crust:
- Pour the crumb mixture into your prepared baking dish and use the bottom of a measuring cup or glass to firmly press the crust into an even layer. Pay special attention to the corners and edges to create a solid foundation for your bars. The more firmly you press, the better your crust will hold together when sliced.
- Create the Cream Cheese Base:
- In a large mixing bowl, beat the softened cream cheese with an electric mixer until completely smooth and fluffy, about 2 minutes. This step is crucial for avoiding lumps in your final product. Make sure your cream cheese is properly softened at room temperature for at least 30 minutes before beginning.
- Add Sweetness and Flavor:
- Add the confectioners' sugar and cherry pie filling to the cream cheese. Beat at medium speed until fully incorporated and the mixture turns a beautiful pink color. Be sure to scrape down the sides of the bowl to ensure everything is evenly mixed.
- Incorporate the Chocolate:
- Gently fold in 1 cup of the mini chocolate chips using a rubber spatula, reserving the remaining ¼ cup for topping. Using a folding motion rather than stirring preserves the airiness of the mixture and prevents the chips from sinking to the bottom.
- Complete the Filling:
- Carefully fold in the whipped cream using a light hand to maintain the airy texture. Continue folding just until no white streaks remain. Overmixing will deflate the filling.
- Assemble and Chill:
- Pour the completed filling over the Oreo crust and use an offset spatula to spread it into an even layer. Sprinkle the reserved ¼ cup of mini chocolate chips over the top. Cover with plastic wrap and refrigerate for at least 4 hours or preferably overnight to allow the bars to set completely.
 Pin it
The cherry pie filling is truly the star ingredient in this recipe. I discovered this delightful combination when trying to use up leftover cherry pie filling from Thanksgiving. My daughter declared it tasted like a chocolate covered cherry in dessert form, and now it's our most requested special occasion treat.
Frequently Asked Questions
- → Can I use a different crust instead of Oreos?
Yes, you can use graham crackers, chocolate wafers, or any cookie of your choice for the crust.
- → Can I substitute the cherry pie filling?
Yes, you can replace cherry pie filling with another fruit filling like strawberry, blueberry, or raspberry for variety.
- → How long should the bars chill before serving?
The bars need to be refrigerated for at least 4 hours to ensure the filling is set and firm.
- → Can I make this dessert ahead of time?
Yes, these bars can be prepared a day in advance and stored in the refrigerator until ready to serve.
- → Can I add nuts or other toppings?
Absolutely! Crushed nuts, shredded coconut, or additional chocolate chips make great toppings to enhance flavor and texture.