
 Pin it
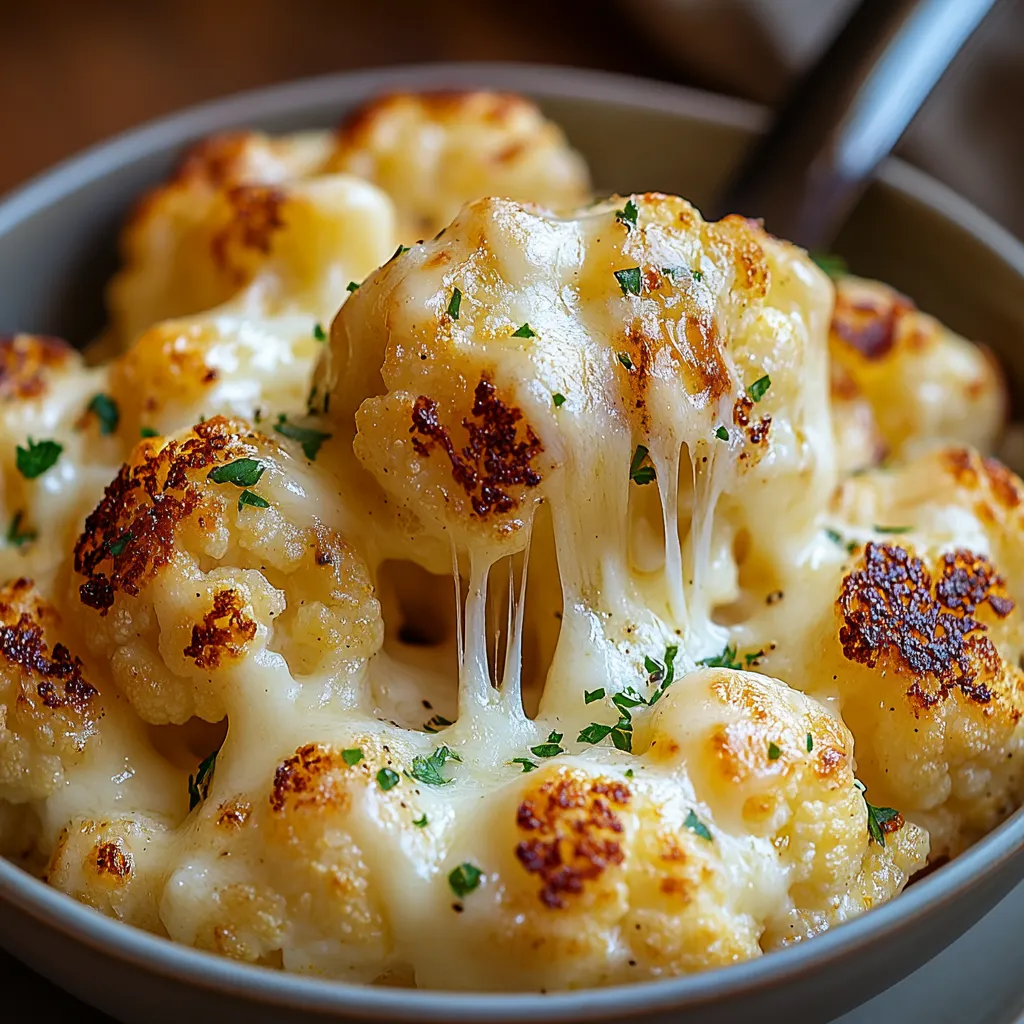
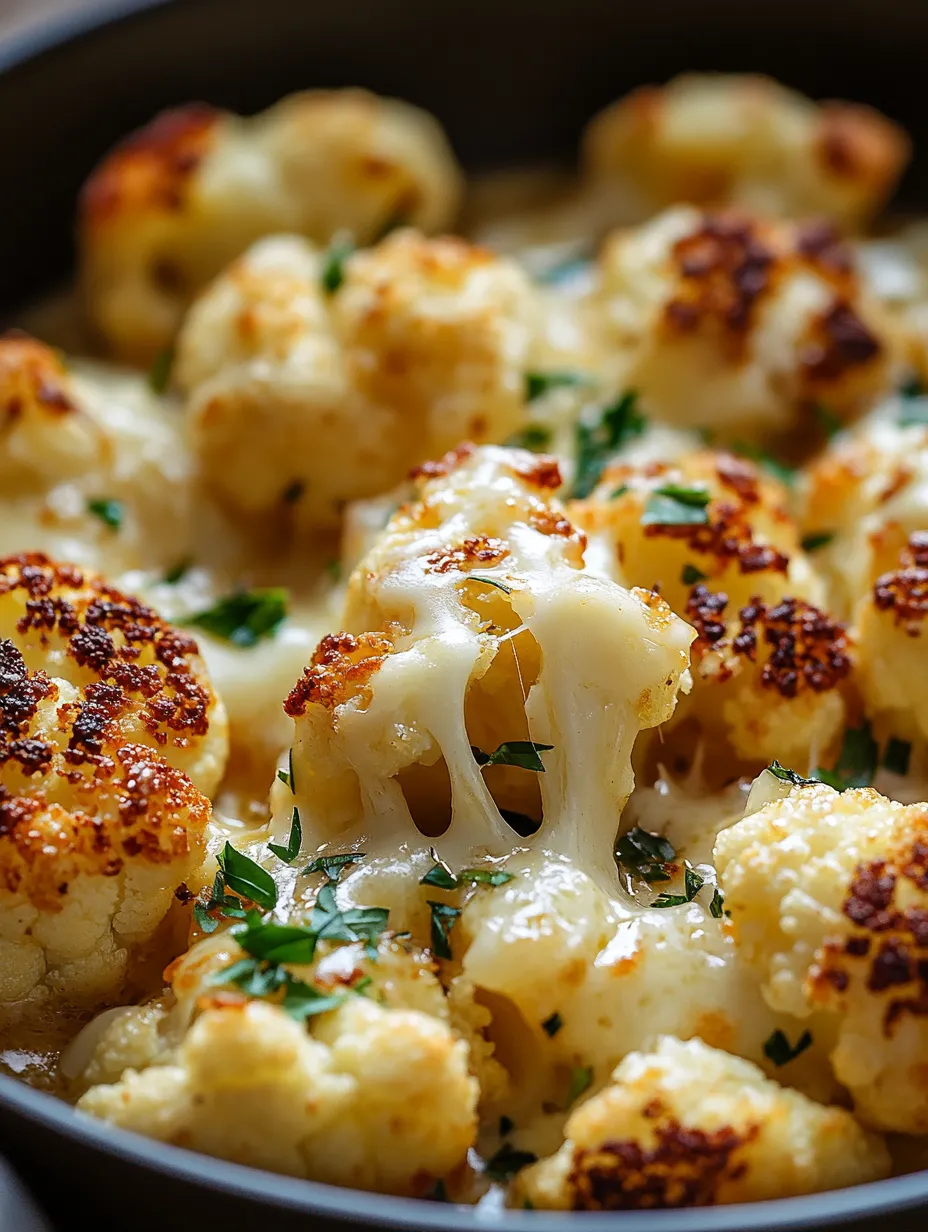
This hearty oven-roasted cauliflower dish transforms an ordinary vegetable into a crave-worthy side that even vegetable skeptics will love. The magic happens when the high heat creates those perfectly caramelized edges while the cheese topping adds a savory, melty layer that takes it to the next level.
I first created this recipe when trying to convince my cheese-loving nephew to eat more vegetables. He ended up asking for seconds and now specifically requests my "cheesy cauliflower" whenever he visits. It's become our special thing, and I couldn't be prouder.
Ingredients
- Cauliflower florets: the star of the show, look for heads that feel heavy for their size with tight, creamy white florets
- Olive oil: helps achieve that perfect golden exterior, use extra virgin for best flavor
- Salt and pepper: basic seasonings that enhance the natural sweetness of roasted cauliflower
- Garlic powder: provides even garlic flavor without the risk of burning that fresh garlic has
- Smoked paprika: adds a subtle smoky depth that elevates the whole dish
- Parmesan cheese: brings a nutty, salty element that creates the perfect crust
- Sharp cheddar cheese: melts beautifully while providing rich, tangy flavor
- Fresh parsley: adds a pop of color and fresh flavor to balance the richness
Step-by-Step Instructions
- Preheat and Prepare:
- Heat your oven to a hot 425°F which is crucial for developing those crispy, caramelized edges that make this dish special. Line your baking sheet with parchment paper for easy cleanup and to prevent sticking. Make sure your oven is fully preheated before adding the cauliflower for best results.
- Season the Cauliflower:
- Toss your florets thoroughly in the olive oil first to ensure even coating before adding the seasonings. Make sure every piece gets coated with the spice mixture for consistent flavor. Try to keep the florets roughly the same size so they cook evenly. The oil not only helps the seasonings stick but also contributes to that beautiful browning.
- Roast the Cauliflower:
- Arrange the florets in a single layer with some space between each piece this is critical for achieving crispiness rather than steaming. The halfway flip ensures even browning on all sides. Look for golden brown edges and a fork that pierces easily through the stems to know they're done. Don't rush this step as proper caramelization is where the magic happens.
- Add the Cheese:
- Layer the cheeses strategically Parmesan first because it needs a bit more time to create that crispy layer, then the cheddar which melts quickly. Watch carefully during the final few minutes as cheese can go from perfectly melted to burnt very quickly. The Parmesan creates a crispy coating while the cheddar provides that gooey, satisfying melt.
- Serve and Garnish:
- Serve immediately while the cheese is still bubbling for the best texture and flavor experience. The fresh parsley adds a bright, herbaceous note that cuts through the richness and provides visual appeal. A final sprinkle of flaky sea salt just before serving can elevate the flavors even further.
 Pin it
My absolute favorite part of this recipe is the contrast between the crispy, caramelized edges and the melty cheese topping. It reminds me of the comfort foods I grew up with but in a much healthier form. My mother always said the best recipes have textural contrast, and this dish proves her right every time.
Make Ahead and Storage
This cauliflower dish can be prepared up to the roasting stage a day in advance. Simply toss with oil and seasonings, refrigerate, then roast when ready to serve. For leftovers, store in an airtight container in the refrigerator for up to 3 days. Reheat in a 350°F oven for 10 minutes rather than microwaving to maintain some crispness. The flavor actually deepens overnight as the spices continue to infuse the cauliflower.
Clever Variations
Transform this side dish into countless variations by switching up the flavor profile. Try Mediterranean style with oregano, lemon zest and feta cheese instead of cheddar. For an Asian inspired version, replace the paprika with curry powder and top with sesame seeds instead of cheese. Buffalo lovers can toss the roasted cauliflower in hot sauce before adding blue cheese crumbles. Each variation maintains the same cooking technique but delivers a completely different experience.
 Pin it
Serving Suggestions
This versatile side pairs beautifully with simple proteins like roasted chicken, grilled steak, or baked fish. For a vegetarian meal, serve alongside a hearty grain like farro or quinoa. It also makes an impressive appetizer when served with toothpicks and a cooling dip like ranch or blue cheese dressing. For brunch, try topping with a poached egg and letting the yolk create a rich sauce that coats each piece.
Frequently Asked Questions
- → How do I make roasted cauliflower crispy?
To ensure crispy roasted cauliflower, toss the florets in olive oil and spread them evenly on a baking sheet. For extra crunch, coat them lightly with cornstarch before baking.
- → Can I use other cheeses instead of cheddar and Parmesan?
Yes, you can substitute with your favorite cheeses, such as mozzarella, Gruyère, or Asiago, to customize the flavor profile.
- → What’s the best way to prevent soggy cauliflower?
Make sure to dry the cauliflower thoroughly after washing and avoid overcrowding on the baking sheet to promote even roasting.
- → Can I make this dish ahead of time?
While it’s best served fresh, you can roast the cauliflower ahead of time and reheat it in the oven before adding the cheeses.
- → What variations can I try for extra flavor?
Add spices such as chili powder, cumin, or a drizzle of hot sauce for additional heat. You can also experiment with fresh herbs like thyme or rosemary.
- → How do I store leftover roasted cauliflower?
Store leftovers in an airtight container in the refrigerator for up to three days. Reheat in the oven or air fryer for the best texture.