
 Pin it
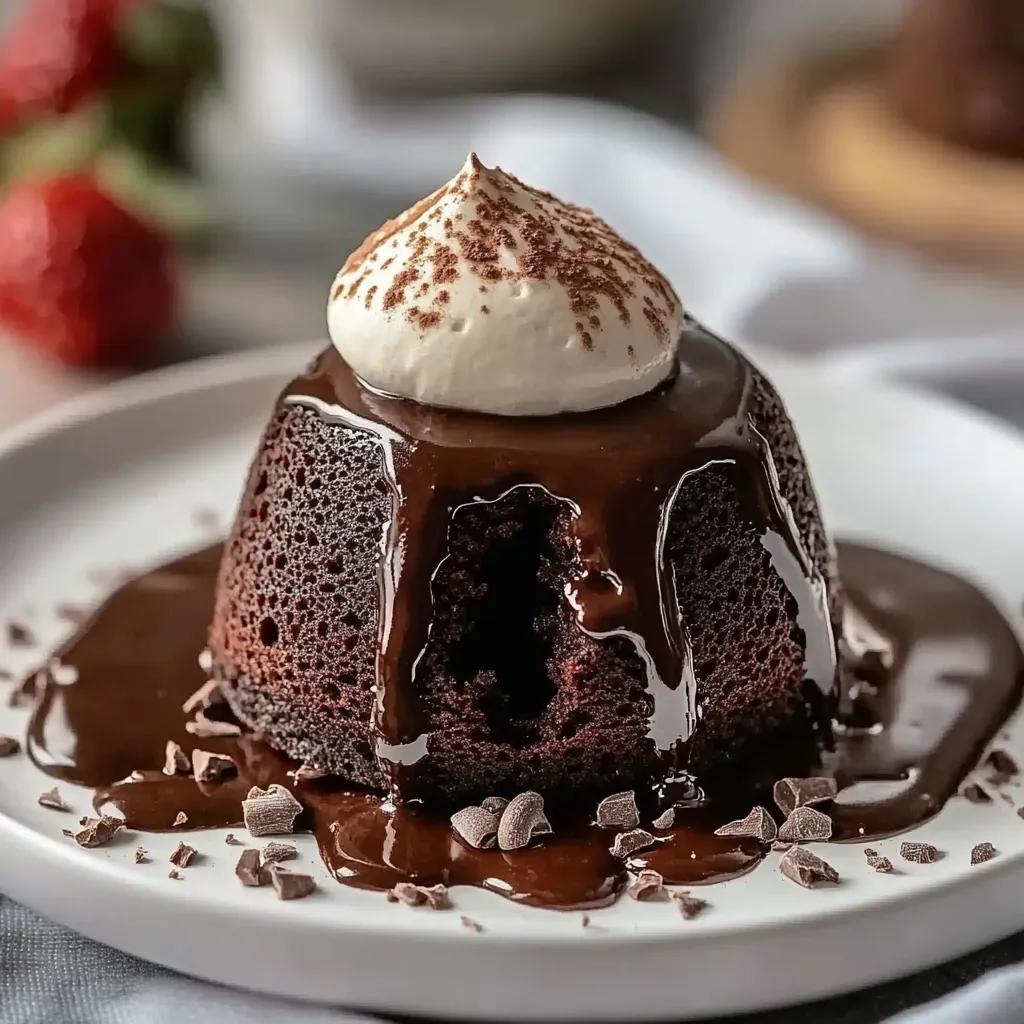
This chocolate lava cake delivers the ultimate dessert experience with its irresistible molten center that flows like liquid gold when you break into it. The contrast between the tender cake exterior and rich chocolate interior creates a dessert worthy of any special occasion, yet simple enough for an everyday indulgence.
I first made these lava cakes for a Valentine's Day dinner, and the moment my partner's face lit up with the first bite, I knew this recipe would become our special tradition. Years later, it's still our go-to whenever we want to transform an ordinary evening into something memorable.
Ingredients
- High-quality dark or semi-sweet chocolate: 6 oz forms the heart of this recipe, splurge on the best you can find as its flavor is front and center
- Unsalted butter: 6 tbsp creates richness and helps achieve that perfect molten center
- Large eggs: 2 whole provide structure to the cake exterior
- Large egg yolks: 2 additional contribute to that luscious flowing center
- Granulated sugar: ¼ cup balances the chocolate intensity with just the right sweetness
- All-purpose flour: ¼ cup just enough to create cake structure without making it too firm
- Pinch of salt: enhances all the flavors and balances sweetness
- Optional espresso powder: intensifies chocolate flavor without adding coffee taste
- Optional orange zest: brings brightness that cuts through the richness
Step-by-Step Instructions
- Prepare the Ramekins:
- Preheat your oven to 425°F. This high temperature is crucial for creating that perfect contrast between cooked exterior and molten interior. Thoroughly butter four ramekins, making sure to coat every bit of the surface. The butter layer should be visible but not excessive. Dust with cocoa powder, tapping out any excess. This preparation ensures your cakes will release cleanly after baking.
- Melt the Chocolate and Butter:
- Combine chocolate and butter in a microwave-safe bowl. Patience is key here. Heat in short 20-second bursts, stirring thoroughly between each interval. The residual heat will continue melting the mixture even outside the microwave. Stop heating when a few small chocolate pieces remain and stir until completely smooth. The mixture should be glossy and silky without any graininess.
- Whisk the Eggs and Sugar:
- In a separate bowl, combine eggs, egg yolks and sugar. Whisk vigorously for about 2 minutes until the mixture becomes noticeably lighter in color and slightly thickened. This incorporates air and creates the structure needed for your cake exterior. The mixture should fall from the whisk in thick ribbons when properly whisked.
- Combine Ingredients:
- Pour the slightly cooled chocolate mixture into the egg mixture in a slow, steady stream while gently stirring. This gradual incorporation prevents cooking the eggs. Once combined, sift the flour and salt directly over the bowl and fold using a spatula with a gentle cutting motion. Stop the moment no dry flour remains visible. Overmixing will develop gluten and result in a tougher cake.
- Fill the Ramekins:
- Divide your batter evenly among the prepared ramekins. Each should be about three-quarters full, leaving space for the cakes to rise during baking. Tap each ramekin gently on the counter to release any trapped air bubbles. Smooth the tops with the back of a spoon if needed.
- Bake:
- Place the filled ramekins on a baking sheet for easier handling. Bake for precisely 12-14 minutes. The top should look set and dry, while a slight jiggle in the center indicates the molten interior is perfect. The edges will have pulled slightly away from the sides of the ramekin. This timing is critical watch carefully as even one minute too long can solidify the center.
- Serve Immediately:
- Let the cakes rest for exactly one minute after removing from the oven. Run a thin knife around the edge of each ramekin, place a dessert plate on top, and carefully but confidently invert. Wait 10 seconds before lifting the ramekin. If properly prepared, the cake will release easily, revealing its perfect domed top.
The first time I served these at a dinner party, I removed them from the oven just as guests were finishing their main course. The collective gasp when I cut into the first cake and revealed that perfect molten center made all the careful timing worthwhile. That moment of dessert drama is why I never substitute this recipe with anything else for special gatherings.
The Perfect Temperature Guide
The secret to achieving that ideal molten center lies in precise temperature control. Your oven should be fully preheated before the cakes go in. If your oven runs hot or cold, adjust accordingly. The center of these cakes reaches about 160°F when perfectly cooked, ensuring food safety while maintaining that flowing chocolate heart. For extra precision, use an instant-read thermometer inserted into the side of the cake when testing for doneness.
Ingredient Substitutions
While the classic recipe yields perfect results, several variations can accommodate dietary needs or preferences. For a gluten-free version, substitute the all-purpose flour with an equal amount of almond flour, which adds a pleasant nuttiness. Those avoiding dairy can use coconut oil instead of butter, though this will slightly alter the flavor profile. White chocolate can replace dark for a sweeter, more mellow experience. I once made them with ruby chocolate for a Valentine's Day surprise, creating a stunning pink interior that was both visually striking and delicious.
Serving Suggestions
These lava cakes truly shine when thoughtfully accompanied. A scoop of vanilla bean ice cream provides the perfect temperature contrast to the warm cake. For a more sophisticated presentation, try serving with lightly whipped cream flavored with bourbon or Grand Marnier. Fresh raspberries or sliced strawberries cut through the richness with their bright acidity. I particularly love creating a simple raspberry coulis by blending fresh raspberries with a touch of sugar and straining to remove seeds, then drizzling it around the plate for both flavor and visual appeal.
Storage and Make-Ahead Tips
If you need to prepare ahead for a dinner party, make the batter up to 24 hours in advance and refrigerate it in a covered container. When ready to bake, portion the cold batter into prepared ramekins and add 1-2 minutes to the baking time. For an even more convenient approach, you can fill the prepared ramekins with batter, cover with plastic wrap, and refrigerate. Allow them to come to room temperature for 30 minutes before baking for best results. Remember that these cakes do not store well after baking as the center solidifies, so only bake what you plan to serve immediately.
Frequently Asked Questions
- → How do I ensure the lava cake has a gooey center?
To achieve a gooey center, bake the cakes for 12-14 minutes. The edges should be set, while the center stays soft and molten.
- → Can I use milk chocolate instead of dark chocolate?
Milk chocolate can be used, but it will yield a sweeter result. Dark or semi-sweet chocolate is recommended for a rich flavor.
- → What can I serve with chocolate lava cake?
This dessert pairs wonderfully with vanilla ice cream, fresh berries, or a light dusting of powdered sugar on top.
- → Can I prepare the batter ahead of time?
Yes, you can prepare the batter and refrigerate it in the ramekins for up to 24 hours. Bring to room temperature before baking.
- → What size ramekins should I use?
Use 6 to 8-ounce ramekins for this dish to ensure even baking and the proper gooey consistency in the center.
- → Is there any alternative for cocoa powder in prepping ramekins?
You can use powdered sugar or flour instead of cocoa powder, but cocoa powder enhances the chocolate flavor and avoids a white coating.