
 Pin it
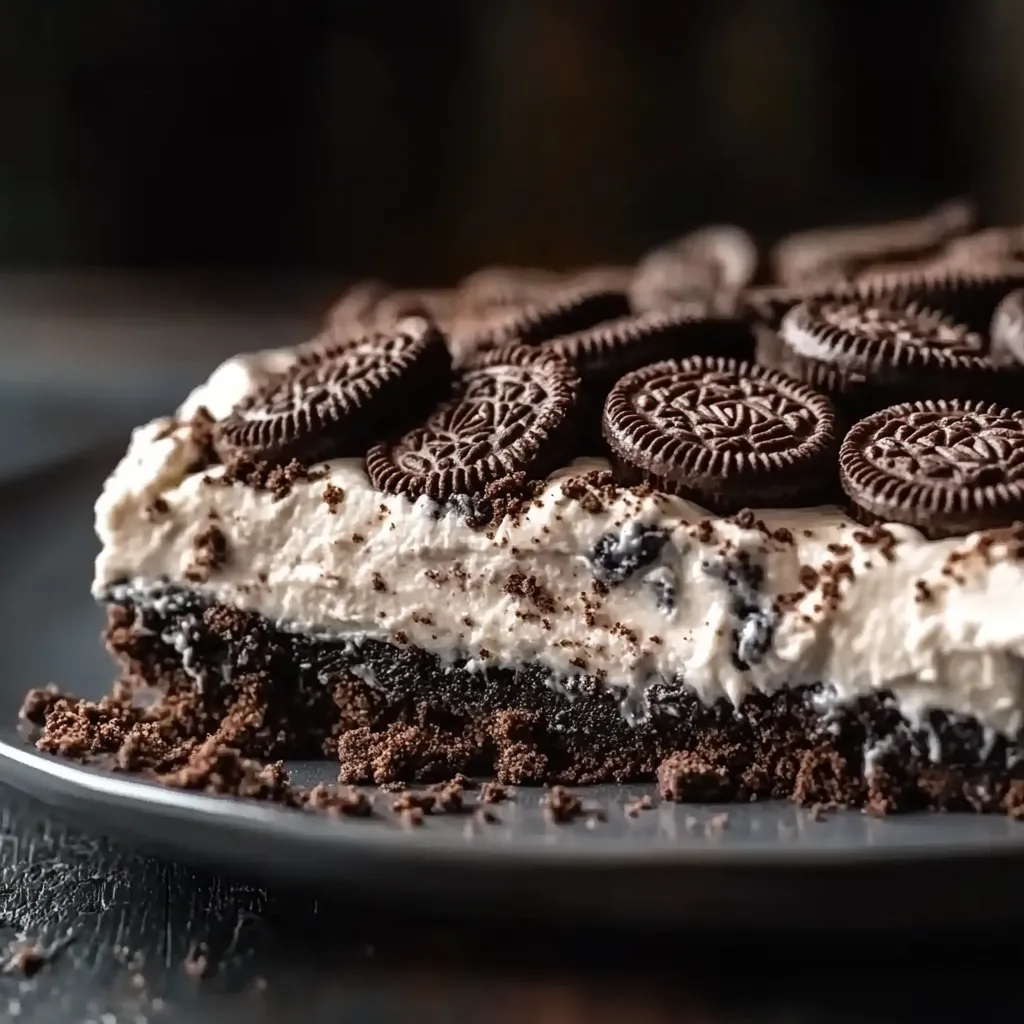
This nostalgic Oreo Dirt Pie combines creamy chocolate pudding, smooth cream cheese, and crushed cookies into a decadent dessert that always brings smiles. Perfect for both casual family dinners and special occasions, it's a crowd-pleaser that requires no baking skills.
I first made this pie for my nephew's dinosaur-themed birthday party. The "dirt" concept was an instant hit with the children, who delighted in the gummy worms peeking out from the dessert. Now it has become our most requested treat for summer gatherings.
Ingredients
- Oreo cookies: Provide the chocolate foundation both as crust and topping giving that authentic dirt appearance
- Unsalted butter: Binds the crust together while adding richness look for European style for extra creaminess
- Cream cheese: Creates a tangy middle layer that balances the sweetness choose full-fat for best texture
- Powdered sugar: Sweetens without graininess making for silky smooth filling
- Vanilla extract: Enhances all flavors use pure rather than imitation for best results
- Instant chocolate pudding mix: Delivers quick chocolatey goodness with minimal effort
- Cold milk: Activates the pudding the colder the better for proper setting
- Frozen whipped topping: Creates the light fluffy finishing layer that perfectly complements the denser layers below
- Gummy worms: Add the fun factor that makes this dessert memorable opt for colorful varieties for visual appeal
Step-by-Step Instructions
- Create the Oreo Crust:
- Process Oreo cookies until they become fine crumbs resembling actual dirt. The texture should be consistent throughout with no large chunks remaining. Mix these crumbs thoroughly with melted butter until every particle is moistened. Press this mixture firmly into your pie dish using the bottom of a measuring cup to ensure a compact base that won't crumble when sliced.
- Prepare Cream Cheese Layer:
- Beat room temperature cream cheese until it becomes completely smooth without any lumps. This usually takes about 3 minutes with an electric mixer. Gradually add powdered sugar while continuing to beat then incorporate the vanilla. The resulting mixture should be velvety and spreadable with a slight tanginess that balances the sweet chocolate layers.
- Create Chocolate Pudding:
- Whisk pudding mix with cold milk vigorously until completely combined. Allow it to set for precisely 2 minutes before using to achieve the perfect consistency. The pudding should coat the back of a spoon and be thick enough to hold its shape when layered.
- Assemble The Layers:
- Spread cream cheese layer carefully over crust using an offset spatula for even distribution. Pour prepared pudding over the cream cheese ensuring complete coverage with no white peeking through. Top with whipped topping spreading it into decorative swirls if desired. For best presentation make distinct visible layers by allowing each layer to set slightly before adding the next.
My favorite part about making this pie is watching guests discover the gummy worms hidden throughout. At our annual block party last summer, I created individual servings in clear plastic cups, creating a trifle effect with multiple layers visible from the sides. The children were absolutely delighted, and several parents asked for the recipe before the evening ended.
Storage Recommendations
This Oreo Dirt Pie keeps beautifully in the refrigerator for up to 3 days when covered tightly with plastic wrap. The flavors actually continue to develop overnight, making this an ideal make-ahead dessert. I recommend waiting to add gummy worm garnishes until shortly before serving, as they can harden in the refrigerator. For best results, allow the pie to sit at room temperature for about 10 minutes before serving to soften slightly for easier slicing.
Easy Substitutions
If you need alternatives for dietary preferences, several simple swaps work beautifully. For a less sweet version, use Neufchâtel cheese instead of regular cream cheese. Dairy-free guests can enjoy this dessert when you substitute plant-based butter, vegan cream cheese, nondairy milk, and coconut whipped topping. Gluten-free chocolate sandwich cookies work perfectly for those avoiding wheat. I once made a mint-chocolate version by using mint Oreos and adding a quarter teaspoon of mint extract to the pudding layer that was especially refreshing during summer months.
Presentation Ideas
Transform this classic pie into an Instagram-worthy dessert with simple presentation upgrades. Serve in a clear glass pie dish to showcase the beautiful layers. For special occasions, arrange small plastic flowers, dinosaurs, or garden tools around the outer edge for a whimsical garden or excavation theme. Individual servings in mason jars or clear cups create a charming portable option for picnics or potlucks. My most successful presentation included small chocolate mushrooms I made from Hershey Kisses attached to chocolate cookie stems emerging from the "dirt" surface.
Cultural Context
This playful dessert emerged in American kitchens during the 1980s when convenience foods like instant pudding and premade cookies became kitchen staples. Often called "Dirt Cake" or "Worms and Dirt," it gained popularity at children's parties before becoming a nostalgic favorite for adults too. The dessert represents the imaginative culinary creativity of home cooks who transformed simple ingredients into memorable experiences. While not sophisticated in culinary terms, its enduring popularity speaks to how food connects to childhood memories and creates joy across generations.
Frequently Asked Questions
- → Can I use homemade whipped cream instead of frozen whipped topping?
Yes, you can substitute homemade whipped cream. Whip heavy cream with a bit of powdered sugar until soft peaks form and use it as a replacement.
- → How do I ensure the Oreo crust sticks together properly?
Ensure the butter is evenly mixed with the crushed Oreos, and press the mixture firmly into the pie dish for a compact crust.
- → Can I make Oreo Dirt Pie ahead of time?
Absolutely! Prepare it a day in advance and keep it refrigerated. This allows the layers to set and the flavors to meld together beautifully.
- → What other toppings can I use besides gummy worms?
Consider toppings like mini chocolate chips, sprinkles, or candy bars. You can also use fresh fruits, such as sliced strawberries or raspberries, for a refreshing twist.
- → Can I use a different pudding flavor?
Yes, you can experiment with flavors like vanilla, butterscotch, or cookies and cream pudding to create unique variations.
- → How do I crush Oreos without a food processor?
Place the Oreos in a resealable plastic bag and use a rolling pin or heavy object to crush them into fine crumbs.