
 Pin it
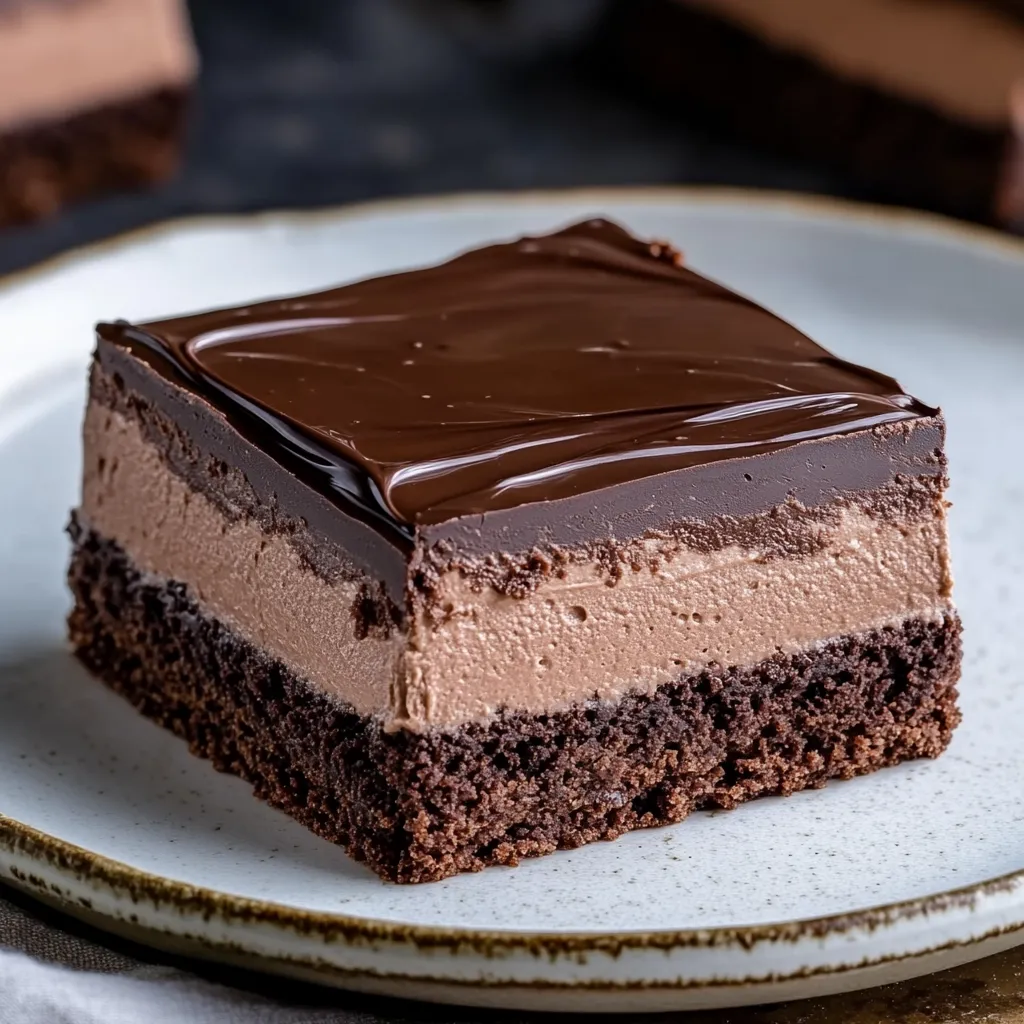
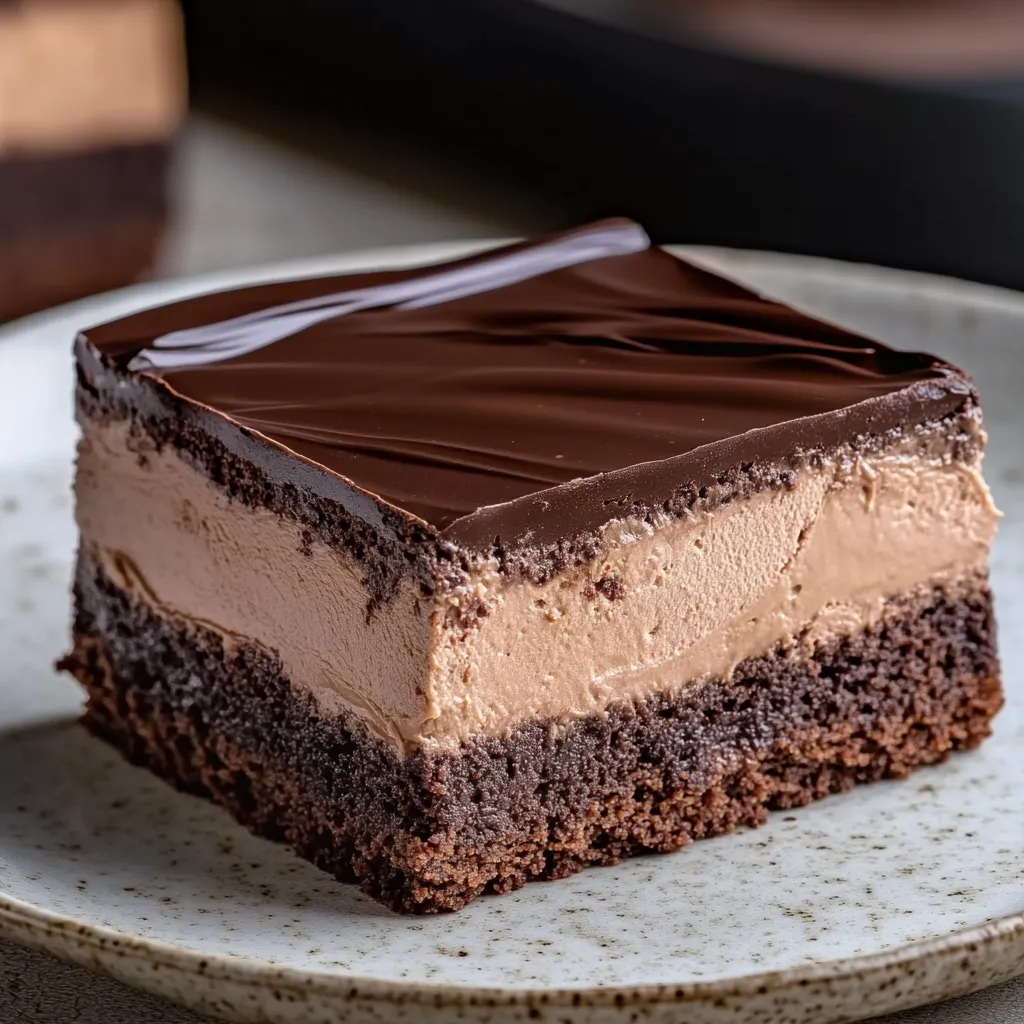
This decadent three-layer chocolate mousse brownie recipe transforms an ordinary brownie into an extraordinary dessert experience. The fudgy brownie base creates the perfect foundation for a cloud-like chocolate mousse middle and a glossy ganache topping that will satisfy even the most discriminating chocolate lover.
I first made these brownies for my sister's birthday dinner when I needed something special that wouldn't require last-minute preparation. The moment my family tasted these silky, multi-textured brownies, they became our go-to celebration dessert.
Ingredients
For the Brownie Base
- Unsalted butter: creates a richer flavor than salted butter and gives you better control over the salt content
- Granulated sugar: provides the perfect sweetness and helps create that classic crackly brownie top
- Large eggs: bind everything together and contribute to the fudgy texture
- Vanilla extract: enhances the chocolate flavor without competing with it
- Unsweetened cocoa powder: delivers deep chocolate flavor without added sugar
- All purpose flour: keeps the brownies dense and fudgy when used in small amounts
- Salt: balances the sweetness and intensifies the chocolate flavor
- Baking powder: gives just enough lift without making them cakey
For the Chocolate Mousse
- Heavy whipping cream: with at least 36% fat content whips up best for the airiest mousse
- Semisweet chocolate: with 54-60% cocoa solids offers balanced flavor rather than overly sweet or bitter notes
- Milk: helps melt the chocolate smoothly and prevents it from seizing
- Powdered sugar: stabilizes the whipped cream and adds subtle sweetness
For the Ganache Topping
- Semisweet chocolate: creates a glossy finish that sets firmly but cuts cleanly
- Heavy cream: creates the perfect pourable consistency for a smooth top layer
Step-by-Step Instructions
- Prepare the brownie base:
- Heat your oven to exactly 350°F and line your baking pan with parchment paper extended over the sides to create handles for easy removal later. Whisk the melted butter and sugar until completely combined, then add eggs one at a time, whisking well after each addition. Add vanilla and whisk until the mixture looks glossy and slightly lighter in color. Sift all dry ingredients directly over the wet mixture to prevent lumps. Use a rubber spatula to fold everything together with a gentle hand, stopping as soon as no dry streaks remain. Overmixing will develop gluten and create cakey rather than fudgy brownies. Spread the batter evenly in your prepared pan, pushing it into the corners. Bake until the edges look set but the center still appears slightly underdone. The residual heat will continue cooking the brownies as they cool.
- Create the chocolate mousse:
- Chop the chocolate into small, uniform pieces to ensure it melts evenly when the hot milk is added. Heat the milk until tiny bubbles form around the edges but remove it before it boils. Pour over the chocolate and resist the urge to stir immediately. The heat from the milk needs time to soften the chocolate fully. After two minutes, start stirring from the center outward until completely smooth. Let the mixture cool until it no longer feels warm to the touch but remains fluid enough to incorporate into the cream. In a separate large bowl, whip the heavy cream and powdered sugar starting on low speed then increasing to medium high. Stop when the cream holds soft peaks that curl over when the beaters are lifted. Add about one third of the whipped cream to the chocolate mixture first to lighten it, then fold in the remaining cream using a large rubber spatula with a gentle down-across-up-and-over motion to maintain as much air as possible in the mousse.
- Apply the finishing ganache:
- Use a sharp knife to chop the chocolate into fine pieces that will melt quickly and evenly. Heat the cream just until small bubbles appear around the edges. Pour over the chocolate and let stand undisturbed to allow the heat to transfer. Stir gently from the center outward until completely smooth. Let the ganache cool for about 5 minutes until slightly thickened but still pourable. This prevents it from seeping into the mousse layer. Pour in the center of the chilled mousse then use an offset spatula to gently spread it to the edges in one smooth motion for the glossiest finish. Return to the refrigerator to set completely before cutting with a warm, clean knife.
 Pin it
I discovered that using room temperature eggs creates a more evenly mixed brownie batter that bakes more consistently. This recipe reminds me of the first time I made it for my daughter's graduation party. I was nervous about serving something I had never tried before to so many guests, but these brownies received more compliments than anything else I served that day.
Storage and Make-Ahead Tips
These brownies actually taste better the next day after the flavors have had time to develop. Store covered in the refrigerator for up to 5 days. The brownies can also be frozen without the ganache layer for up to 3 months. Thaw overnight in the refrigerator and add the ganache before serving. The texture of the mousse may change slightly after freezing but will still taste delicious.
Serving Suggestions
Serve these brownies slightly chilled for the best texture contrast between layers. Cut into small squares as they are quite rich and satisfying. For an elegant presentation, plate individual servings with a small dollop of freshly whipped cream and a few fresh raspberries or strawberries for color contrast. A light dusting of cocoa powder or a simple raspberry sauce drizzled on the plate elevates this dessert to restaurant quality.
Perfect Pairings
These decadent brownies pair beautifully with a variety of beverages. Try serving with a good quality French press coffee, a glass of milk for the kids, or even a dessert wine like port for adults. The contrast of the sweet dessert with a slightly bitter espresso creates a perfect balance. For a truly indulgent experience, offer small glasses of Bailey's Irish Cream to sip alongside.
Frequently Asked Questions
- → Can I use dark chocolate instead of semisweet?
Yes, dark chocolate can be substituted for a more intense flavor. Adjust the sweetness to taste.
- → How can I prevent the mousse from deflating?
Fold the whipped cream gently into the chocolate mixture using a spatula to keep it airy.
- → Can I make this dessert ahead of time?
Absolutely! Prepare it a day in advance to give the layers time to set properly.
- → What size pan should I use for the base?
An 8×8 inch (20×20 cm) baking pan is ideal for this recipe.
- → How should I store leftovers?
Keep the brownies refrigerated in an airtight container for up to 3-4 days.